My First Admin Widget
This is an introduction to Alkami’s Admin widget template. You’ll create and build a new Admin widget and then add a connection to the FirstAdminWidget service so that you can call one of the public service contract methods. This will verify that the service is running and allow you to use a Razor view to see some helpful information.
The example source for this tutorial is located in the latest version of the Alkami Samples package under FirstAdminWidget, typically in C:\AlkamiSDK\Samples\FirstAdminWidget.
Run the following upgrade command to get the latest samples.
Alkami’s Admin Portal
Section titled “Alkami’s Admin Portal”You’ll create a new Admin widget from the template and then add functionality that will let you test and configure the USBFI.Client.Widget.FirstWidget provider service.
You will dress up the UI with Iris components, look at TypeScript and Knockout.js and consider other features that might be nice additions to this widget.
Alkami’s Admin Widget Template
Section titled “Alkami’s Admin Widget Template”Install the template
Section titled “Install the template”Create and Build the Widget
Section titled “Create and Build the Widget”Run As Administrator
Visual Studio must run as an Administrator to locally deploy and debug.
-
Upgrade to the latest version of SDK Templates by running this command in Powershell
Terminal window choco install Alkami.SDK.Templates -y ``` -
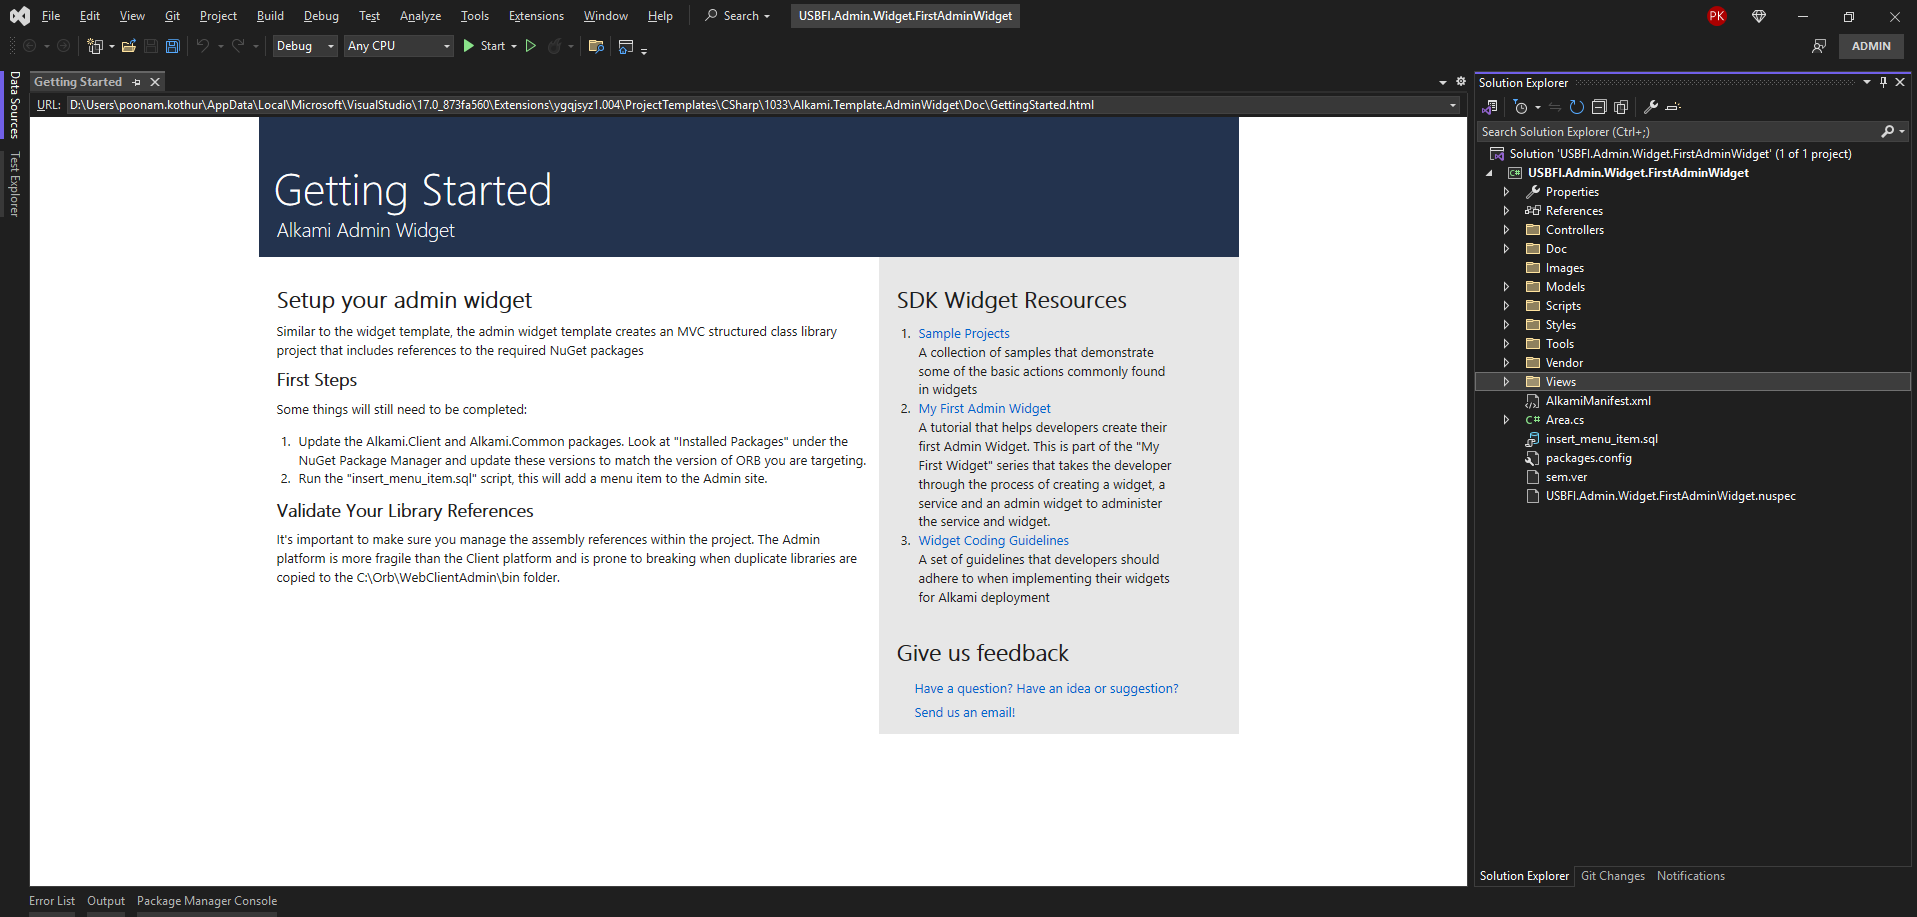
Open Visual Studio
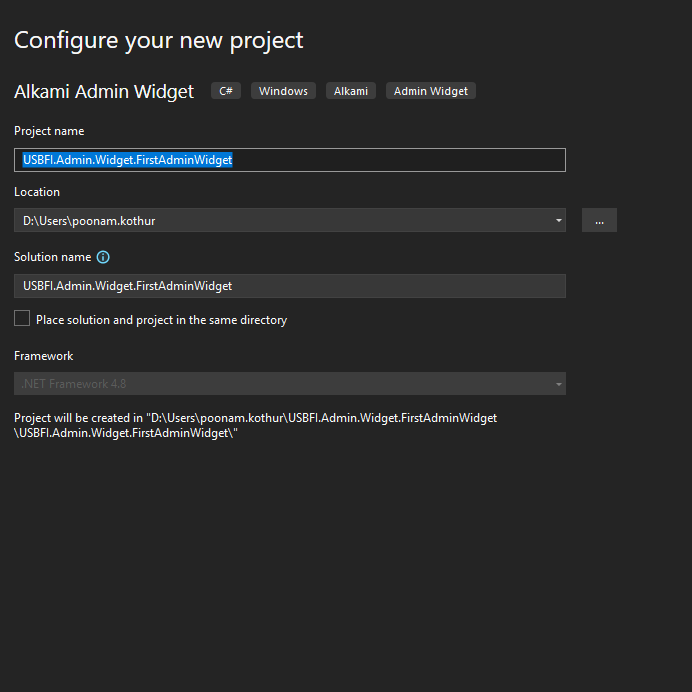
Create a new project and select Alkami Client Widget Template

-
Name the project USBFI.Admin.Widget.MyMoney. This widget will belong to the My Money feature set, which includes the My Money service and My Money client widget.
-
Select any location on your hard drive and uncheck all ckeck boxes if any.
-
Build the solution and verify it succeeds.
Update the admin portal menu
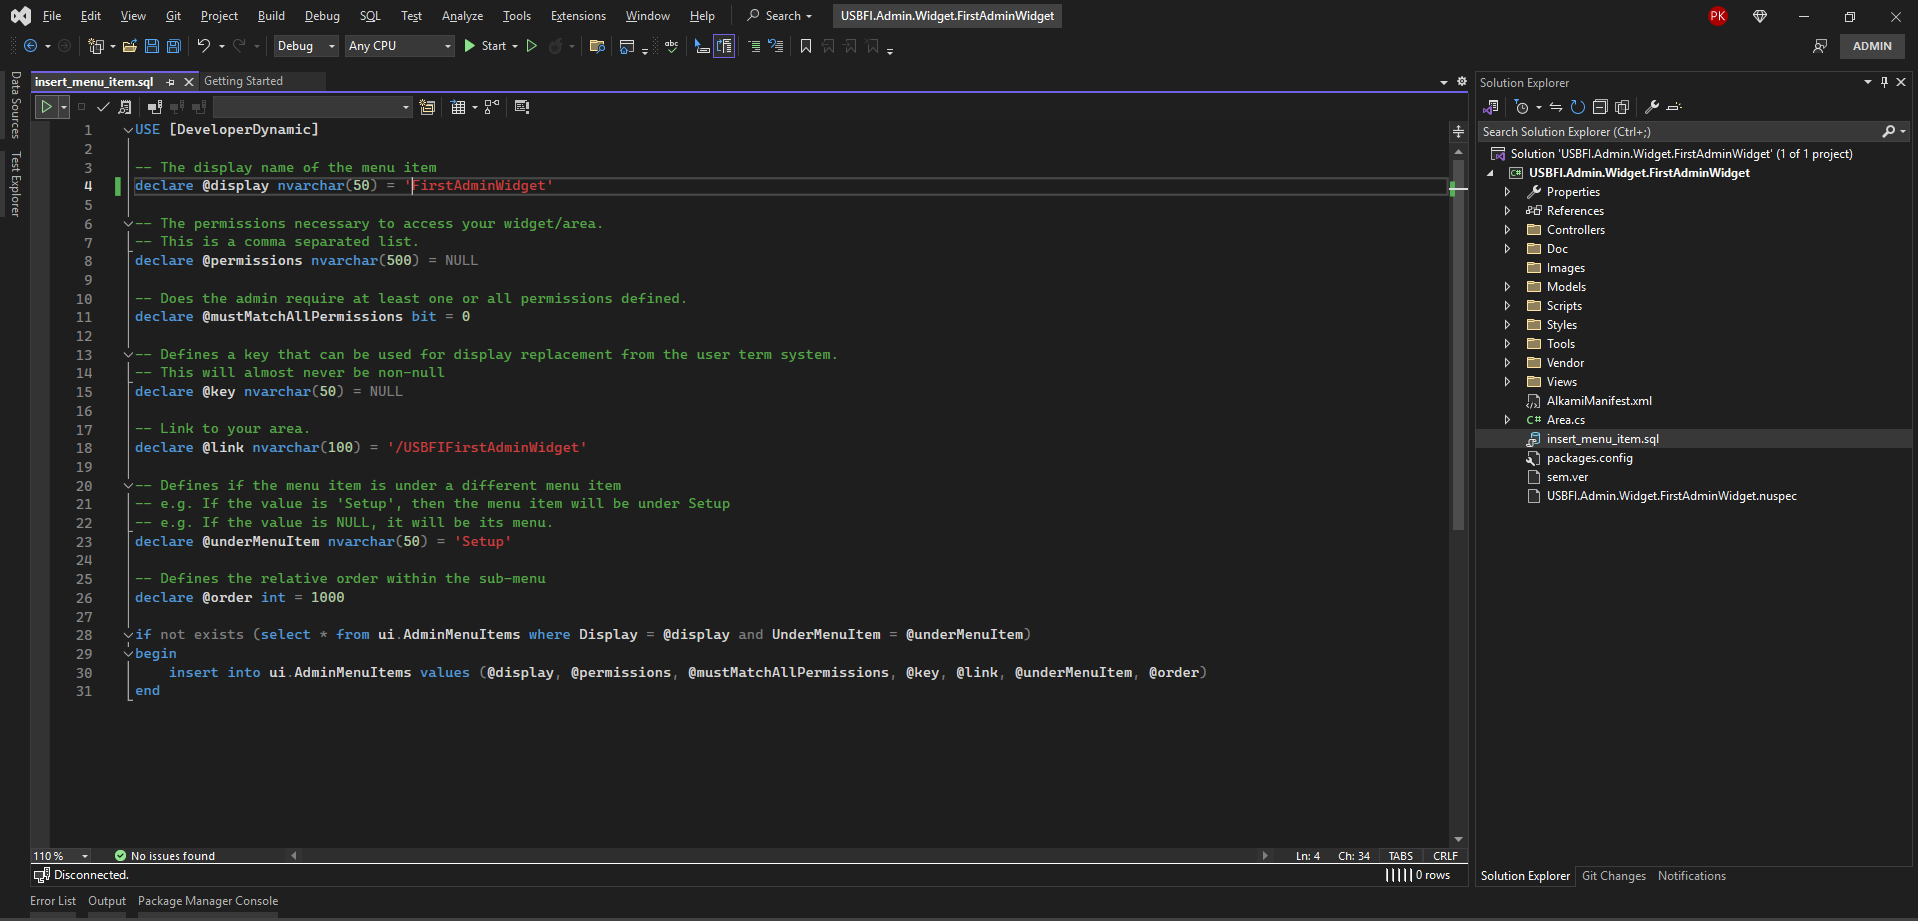
Section titled “Update the admin portal menu”- Go to the
insert_menu_item.sqlscript at the root of the project and open it to edit the contents. - Edit the display name to
FirstAdminWidget, which is friendlier than the default value and leave all the other values as they are. - Save and Execute the script in your local SQL server’s DeveloperDynamic database instance.
Widget content and artifacts
Section titled “Widget content and artifacts”-
Setup
nuspecfile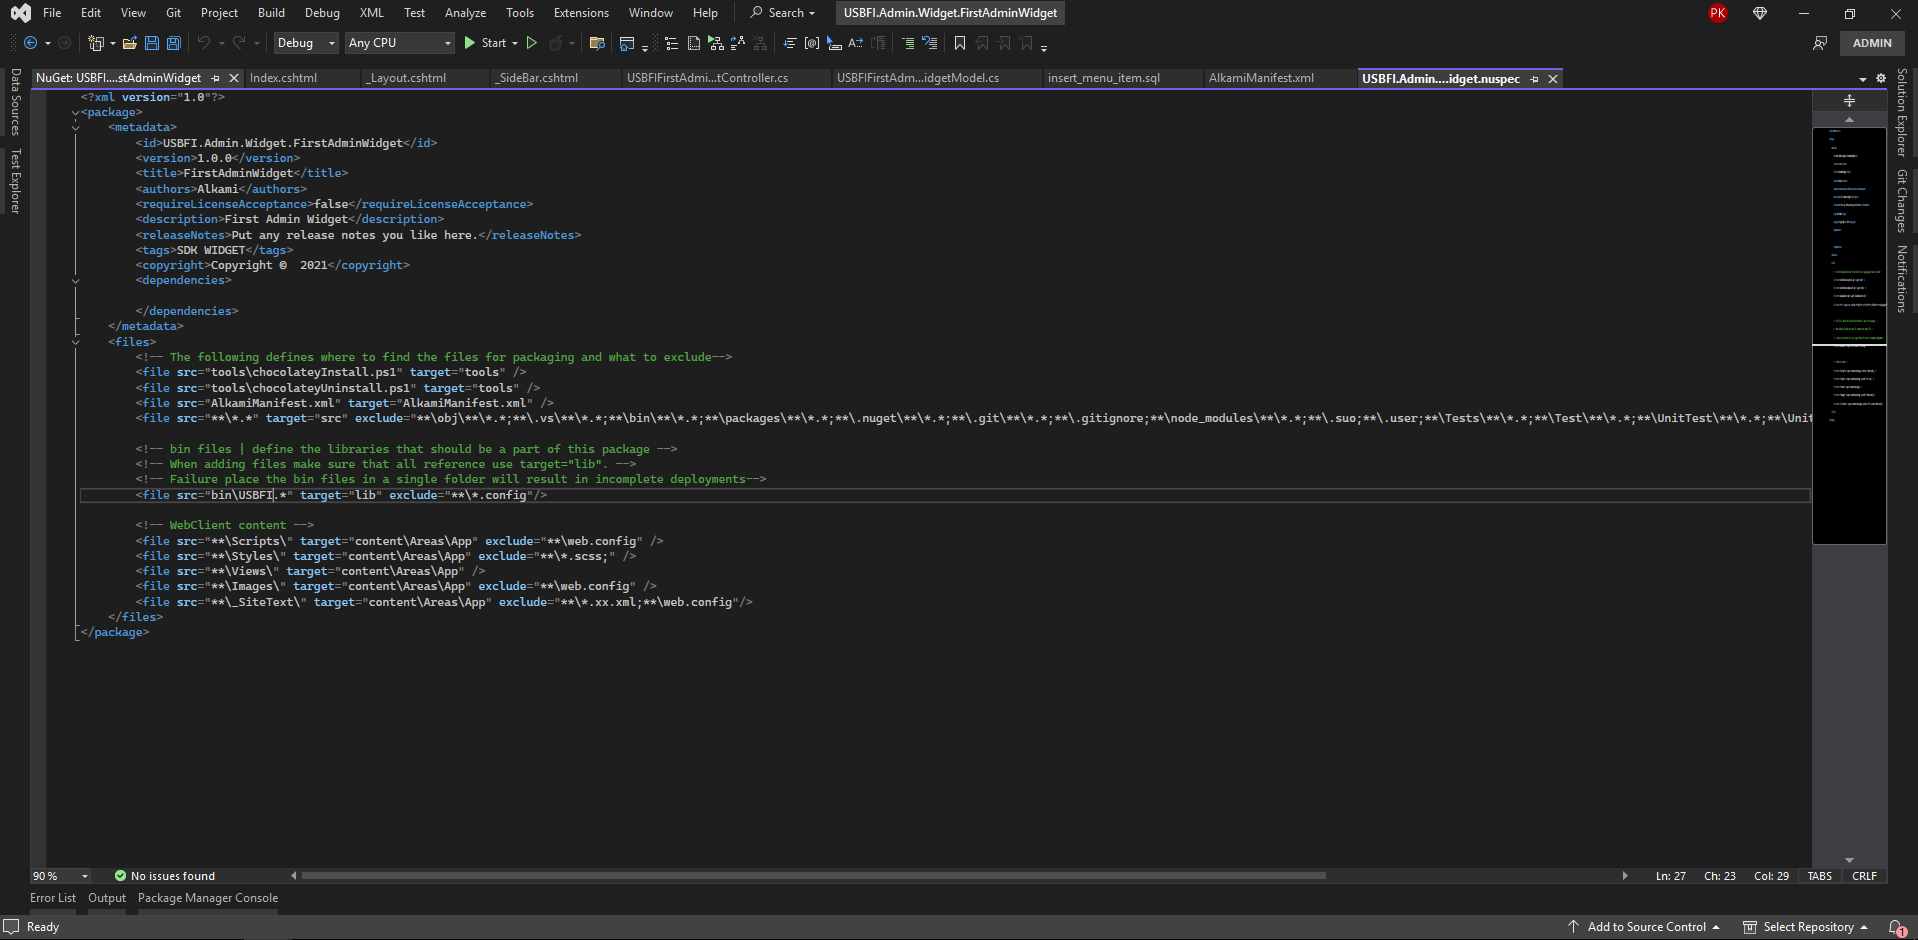 There
There .nuspecfile contains the following main sections: metadata and files.-
The metadata must be completely filled out with fully qualified URLs and values for the blank fields. Visual Studio will fail to package your project if these fields are not completed.
-
The files section will look something like the following. It must define all the files to be packaged. You must uncomment the bin files line out of the box. Additional line items might be needed if the widget depends on any other microservices.
NOTE: This example uses the wildcard notation of
src="bin\USBFI.*"so the package will target any libraries beginning with USBFI. This will be helpful in the next steps when you add the My Money service integration to the widget.USBFI.Admin.Widget.FirstAdminWidget.nuspec<?xml version="1.0"?><package><metadata><id>USBFI.Admin.Widget.FirstAdminWidget</id><version>1.0.0</version><title>FirstAdminWidget</title><authors>Alkami</authors><requireLicenseAcceptance>false</requireLicenseAcceptance><description>First Admin Widget</description><releaseNotes>Put any release notes you like here.</releaseNotes><tags>SDK WIDGET</tags><copyright>Copyright © 2021</copyright><dependencies></dependencies></metadata><files><!-- The following defines where to find the files for packaging and what to exclude--><file src="tools\chocolateyInstall.ps1" target="tools" /><file src="tools\chocolateyUninstall.ps1" target="tools" /><file src="AlkamiManifest.xml" target="AlkamiManifest.xml" /><file src="**\*.*" target="src" exclude="**\obj\**\*.*;**\.vs\**\*.*;**\bin\**\*.*;**\packages\**\*.*;**\.nuget\**\*.*;**\.git\**\*.*;**\.gitignore;**\node_modules\**\*.*;**\.suo;**\.user;**\Tests\**\*.*;**\Test\**\*.*;**\UnitTest\**\*.*;**\UnitTests\**\*.*;**\tools\**\chocolatey*.ps1" /><!-- bin files | define the libraries that should be a part of this package --><!-- When adding files make sure that all reference use target="lib". --><!-- Failure place the bin files in a single folder will result in incomplete deployments--><file src="bin\USBFI.*" target="lib" exclude="**\*.config"/><!-- WebClient content --><file src="**\Scripts\" target="content\Areas\App" exclude="**\web.config" /><file src="**\Styles\" target="content\Areas\App" exclude="**\*.scss;" /><file src="**\Views\" target="content\Areas\App" /><file src="**\Images\" target="content\Areas\App" exclude="**\web.config" /><file src="**\_SiteText\" target="content\Areas\App" exclude="**\*.xx.xml;**\web.config"/></files></package> -
-
Edit the AlkamiManifest.xml and add the BankIdentifier for your financial instituition.
-
Edit the iconName and displaySettings.
-
In the Visual Studio window, read the entire AlkamiManifest_explained.txt to understand the requirements.
-
After editing, the AlkamiManifest.xml might look something like this, where the GUID and other values are specific to your package and FI.
AlkamiManifest.xml<?xml version="1.0"?><packageManifest><version>1.0</version><general><creatorCode>USBFI</creatorCode><compound>USBFI_SDK</compound><element>USBFI.Admin.Widget.FirstAdminWidget</element><componentType>Widget</componentType><!-- SDK clients should add their BankIdentifier(s) in this list. No quotes or brackets - {} - are required. Dashes are encouraged.<bankIdentifiers><bankIdentifier name="USBFI">{Guid}</bankIdentifier></bankIdentifiers>--></general><!-- Widget --><widgetManifest><widgetName>USBFI.Admin.Widget.FirstAdminWidget</widgetName><description>First Admin Widget</description><!-- <widgetInstall>Client|Admin|Generic</widgetInstall> - Generic means this gets installed in both Admin and Client with v1.0 manifests --><widgetInstall>Admin</widgetInstall><areaName>USBFIFirstAdminWidget</areaName><assemblyInfo>USBFI.Admin.Widget.FirstAdminWidget</assemblyInfo><!-- <displaySettings>Desktop|Mobile|Tablet|DesktopMobile|All</displaySettings> --><displaySettings>All</displaySettings><iconName>piggy</iconName></widgetManifest></packageManifest>
Deploy the widget to your local environment
Section titled “Deploy the widget to your local environment”- With the
.nuspecfile andAlkamiManifest.xmlproperly configured, right-click the project or solution or click BUILD from the Visual Studio menu to rebuild the project/solution. - In your browser, go to https://admin-developer.dev.alkamitech.com.
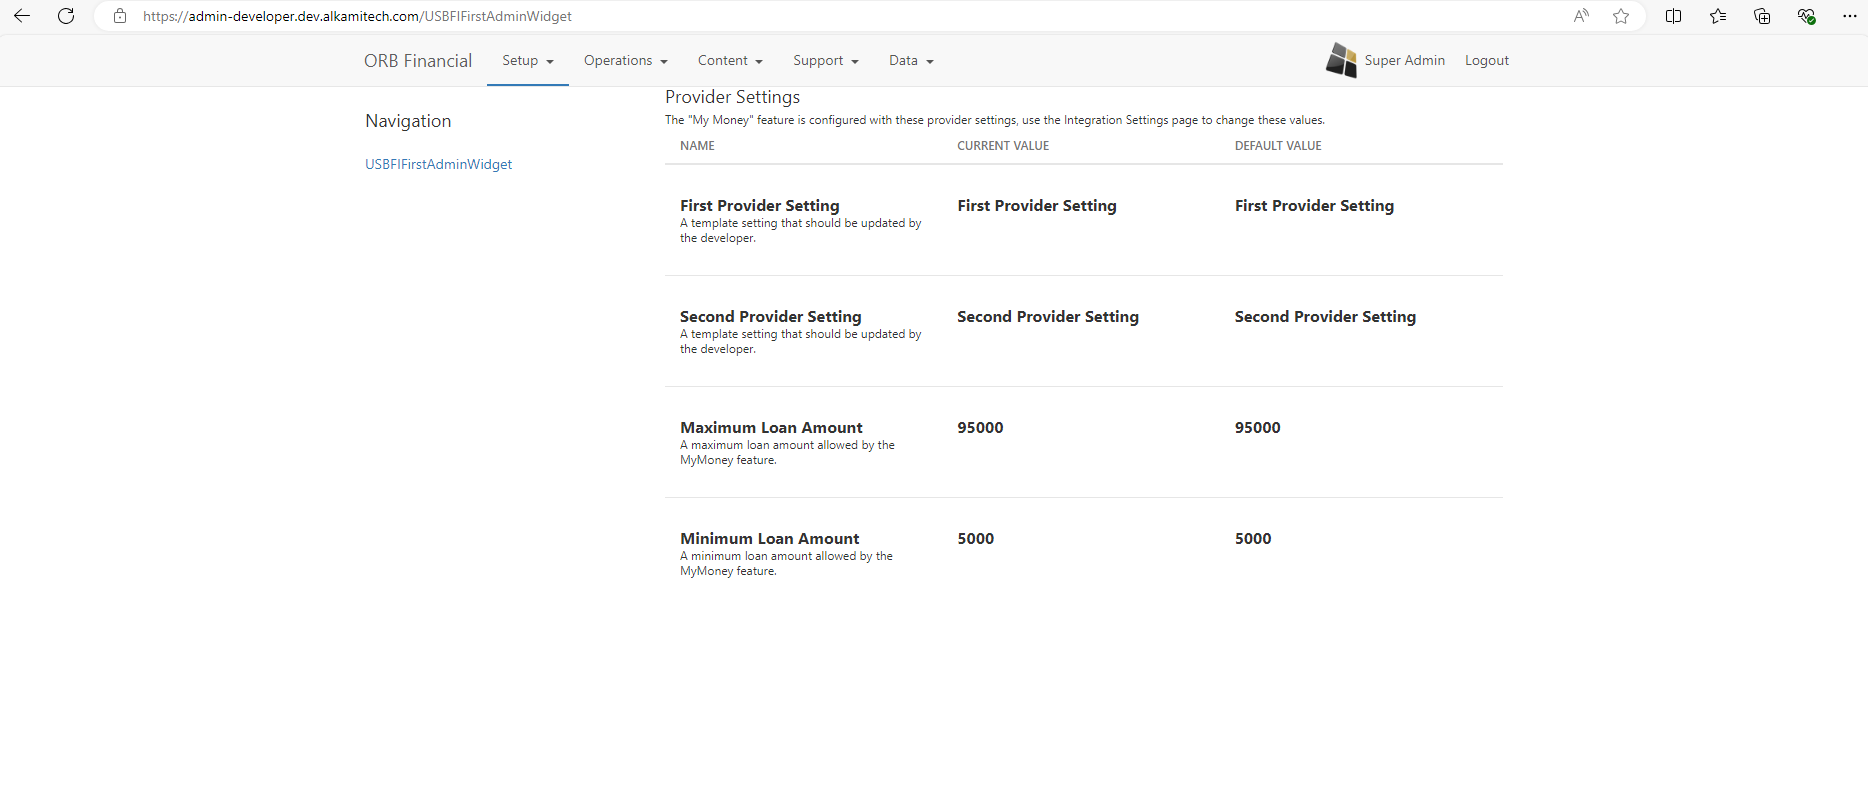
- Go to Setup > First Admin Widget.
Add A New Feature
Section titled “Add A New Feature”With a templated widget now in place, you can add new functionality to use your new admin widget. For this tutorial, you will integrate this new admin widget with the existing USBFI My Money provider-based service so that you can view the service’s settings and prepare for additional features.
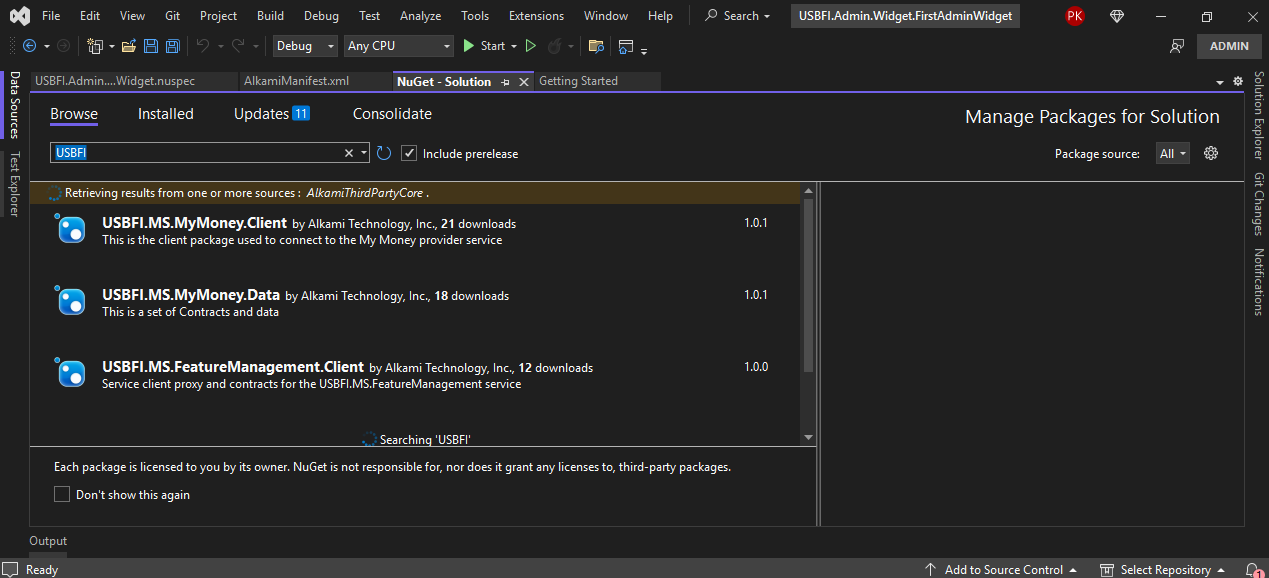
Install the First Admin Widget service Client and Data NuGet packages
Section titled “Install the First Admin Widget service Client and Data NuGet packages”To administer the service, you’ll have to talk to the service, much like a familiar member-facing client widget.
- Use the NuGet Package Manager in Visual Studio to add the Client and Data packages.
This lets you create a proxy and connect with the running service.
Update the USBFIFirstAdminWidgetModel
Section titled “Update the USBFIFirstAdminWidgetModel”The My Money service contracts and data have been added and now you can start using some of those service data models to build out your admin widget models.
Edit the existing model to look like as follows, where the Setting type is using USBFI.MS.MyMoney.Data.ProviderSettings, available from the NuGet packages you just added.
USBFIFirstAdminWidgetModel.cs
using Alkami.Admin.WebClient.Models;using System;using System.Collections.Generic;using System.Linq;using System.Text;using System.Threading.Tasks;using USBFI.MS.MyMoney.Data.ProviderSettings;
namespace USBFI.Admin.Widget.FirstAdminWidget.Models{    // If you want to use a page level model, you will need to derive    // it from the BaseModel class referenced below. This unfortunately    // is a requirement at this time.    public class USBFIFirstAdminWidgetModel : BaseModel    {        public List<Setting> Settings { get; set; }    }}
Add the My Money service client to the controller
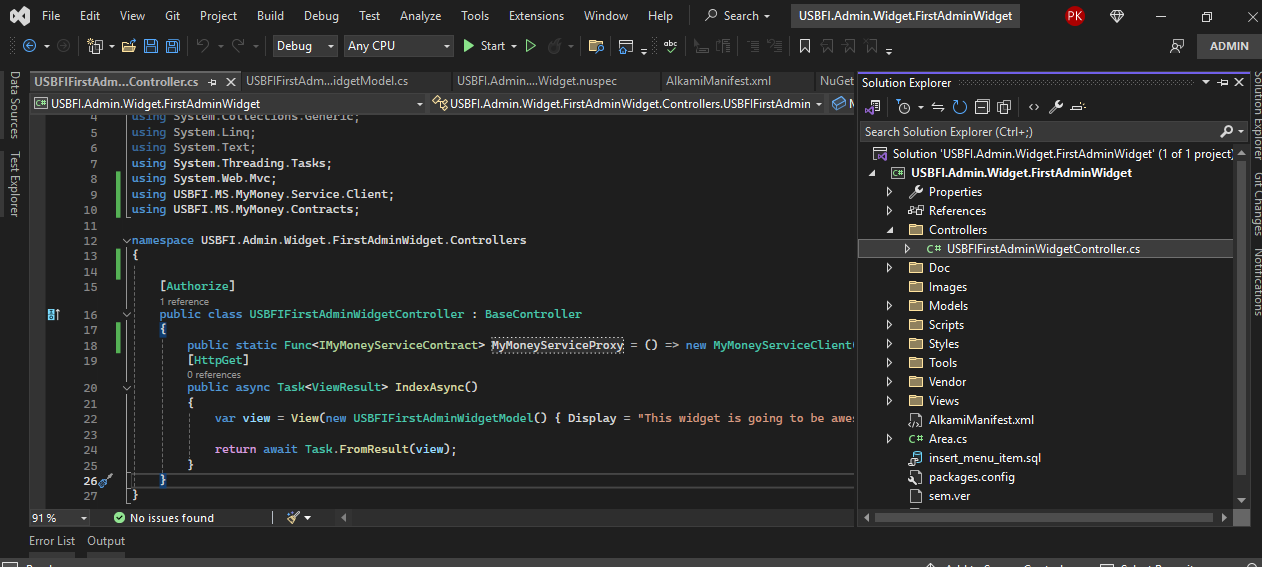
Section titled “Add the My Money service client to the controller”Edit the USBFIFirstAdminWidgetController.cs and add the following lines of code so your controller looks like the one in the
following screenshot.
USBFIFirstAdminWidgetController.cs
using Alkami.Admin.WebClient.Controllers;using USBFI.Admin.Widget.FirstAdminWidget.Models;using System;using System.Collections.Generic;using System.Linq;using System.Text;using System.Threading.Tasks;using System.Web.Mvc;using USBFI.MS.MyMoney.Service.Client;using USBFI.MS.MyMoney.Contracts;
namespace USBFI.Admin.Widget.FirstAdminWidget.Controllers{
    [Authorize]    public class USBFIFirstAdminWidgetController : BaseController    {        public static Func<IMyMoneyServiceContract> MyMoneyServiceProxy = () => new MyMoneyServiceClient();        [HttpGet]        public async Task<ViewResult> IndexAsync()        {            var view = View(new USBFIFirstAdminWidgetModel() { Display = "This widget is going to be awesome." });
            return await Task.FromResult(view);        }    }}
Your controller now has a proxy to the USBFI My Money service, which will allow you to call any of it’s available contract methods.
Update the USBFIFirstAdminWidgetController.cs
Section titled “Update the USBFIFirstAdminWidgetController.cs”Next, you’ll call the My Money service’s GetSettingsAsync() method, use the response data to populate the newly refactored USBFIFirstAdminWidgetModel and then return a new Razor view model.
- Edit the controller to look like the following updated class.
USBFIFirstAdminWidgetController.csusing Alkami.Admin.WebClient.Controllers;using USBFI.Admin.Widget.FirstAdminWidget.Models;using System;using System.Collections.Generic;using System.Linq;using System.Text;using System.Threading.Tasks;using System.Web.Mvc;using USBFI.MS.MyMoney.Service.Client;using USBFI.MS.MyMoney.Contracts;using USBFI.MS.MyMoney.Contracts.Requests;namespace USBFI.Admin.Widget.FirstAdminWidget.Controllers{[Authorize]public class USBFIFirstAdminWidgetController : BaseController{public static Func<IMyMoneyServiceContract> MyMoneyServiceProxy = () => new MyMoneyServiceClient();[HttpGet]public async Task<ViewResult> IndexAsync(){// create a request, augment it and call GetSettingsAsync()var req = new GetSettingsRequest();AugmentRequest(req);var res = await MyMoneyServiceProxy().GetSettingsAsync(req);// assign the response's item list to our model's settings listvar myFirstAdminModel = new USBFIFirstAdminWidgetModel{Settings = res.ItemList};// create a new view and return as an awaited task from resultvar view = View(myFirstAdminModel);return await Task.FromResult(view);}}}
Design an Iris UI
Section titled “Design an Iris UI”The Views of an admin widget are split into folders for the widget and a second folder called Shared that is responsible for loading the layout and extending the left side navigation.
Update the widget’s navigation _SideBar.cshtml
Section titled “Update the widget’s navigation _SideBar.cshtml”-
Rename the header to a user-friendly representation of your widget such as My Money Administration.
-
Change the link text to read Home and the _SideBar.cshtml should now look as follows:
_SideBar.cshtml<h4>Navigation</h4><div class="sidebar"><div><a href="@Url.Action("Index", "USBFIFirstAdminWidget", new { area = "USBFIFirstAdminWidget" } )">USBFIFirstAdminWidget</a></div></div>
Add Iris to the Index view
Section titled “Add Iris to the Index view”Alkami has layouts that define certain frontend frameworks and dependencies.
You’ll use a specific layout for Alkami’s Iris design system.
Each layout specifies sections that must be rendered.
The Index.cshtml must have matching sections for each of the rendered section.
You can add partials as well, in this case a _SideBar that contains the links. The typical Title, Scripts, and Styles are present, but might change for each layout.
For more available layouts, see the C:\Orb\WebClientAdmin\Views\Shared folder.
- Replace the contents of the
Views/Shared/_Layout.cshtmlwith what’s in this snippet._Layout.cshtml@{Layout = "~/Views/Shared/_Layout.Iris.cshtml";}@section Title{@RenderSection("Title", true)}@section Sidebar {@Html.Partial("_SideBar")}@section BodyJSShim{@RenderSection("Scripts", false)}@section Styles{@RenderSection("Styles", false)}@RenderBody()
Use Iris components to quickly build a view
Section titled “Use Iris components to quickly build a view”You’ll be adding code to the part of the file just after where the @sections are defined, starting with some content headers.
-
Add an Iris title content header and a brief description about what this screen will do.
Index.cshtml@using Alkami.Client.Framework.Utility@model USBFI.Admin.Widget.FirstAdminWidget.Models.USBFIFirstAdminWidgetModel@section Title {USBFI FirstAdminWidget (Admin)}@section Scripts {@Html.ScriptWithCacheExpiration("~/Areas/USBFIFirstAdminWidget/Scripts/usbfifirstadminwidget.js")}@section Styles {@Html.CssWithCacheExpiration("~/Areas/USBFIFirstAdminWidget/styles/usbfifirstadminwidget.css")}<h4 class="iris-content-header__title">Provider Settings</h4><small>The "My Money" feature is configured with these provider settings, use the Integration Settings page to change these values.</small> -
Add another content header with the column names inside a new row: Name, Current Value, Default Value
Index.cshtml<h4 class="iris-content-header__title">Provider Settings</h4><small>The "My Money" feature is configured with these provider settings, use the Integration Settings page to change these values.</small><div class="iris-content-header"><div class="container-fluid"><div class="row"><div class="col flex flex-content--between flex--wrap"><div class="iris-content-header__item">Name</div></div><div class="col flex flex-content--between flex--wrap"><div class="iris-content-header__item">Current Value</div></div><div class="col flex flex-content--between flex--wrap"><div class="iris-content-header__item">Default Value</div></div></div></div></div> -
Add a foreach loop to iterate over the available settings and for each setting, create a new Iris record with comfortable spacing.
Index.cshtml@foreach (var setting in @Model.Settings){<div class="iris-record" data-spacing="comfortable"><div class="container-fluid"><div class="row"><div class="col flex flex-content--between flex--wrap"><div class="font-weight--bold block pad-right--sm">@setting.Name</div><small>@setting.Description</small></div><div class="col flex flex-content--between flex--wrap"><div class="font-weight--bold block pad-right--sm">@setting.CurrentValue</div></div><div class="col flex flex-content--between flex--wrap"><div class="font-weight--bold block pad-right--sm">@setting.DefaultValue</div></div></div></div></div>} -
Rebuild the solution and refresh the browser to see the changes.
Next Steps
Section titled “Next Steps”This example is the beginning of a feature set that might be useful to administrators. Other things to consider are:
-
Exercising the My Money service logic
The service has a Loan Decision feature that takes member credit scores and returns an approval amount. A simple submission form will allow an admin user to send values to the service for testing and verification of any adjusted settings.
-
TypeScript:
Knockout.jsandVue.jsMany of Alkami’s admin widgets are written using TypeScript and
Knockout.jsand we’ve also writeVue.jsapplications. There are layouts available for each of these libraries.